1. Before You Begin
- Consult the Provost’s Office Communications page for academic and instructional updates.
- Review federal guidance on regular and substantive interaction in online courses.
- Consider using the ISU Course Template in Canvas or flag the idea for your course improvement plan.
- Explore CELT instructional support options for Canvas and other technology.
- Learn about Iowa State-supported technology approved for use in your classrooms.
2. Create Your Canvas Course
- Log into Canvas at ISU.
- Navigate to ?Help at the bottom of the Global Navigation Menu on the left side of your screen.
- Click on Global Course Administration.
- Authorize ISU AdminTools.
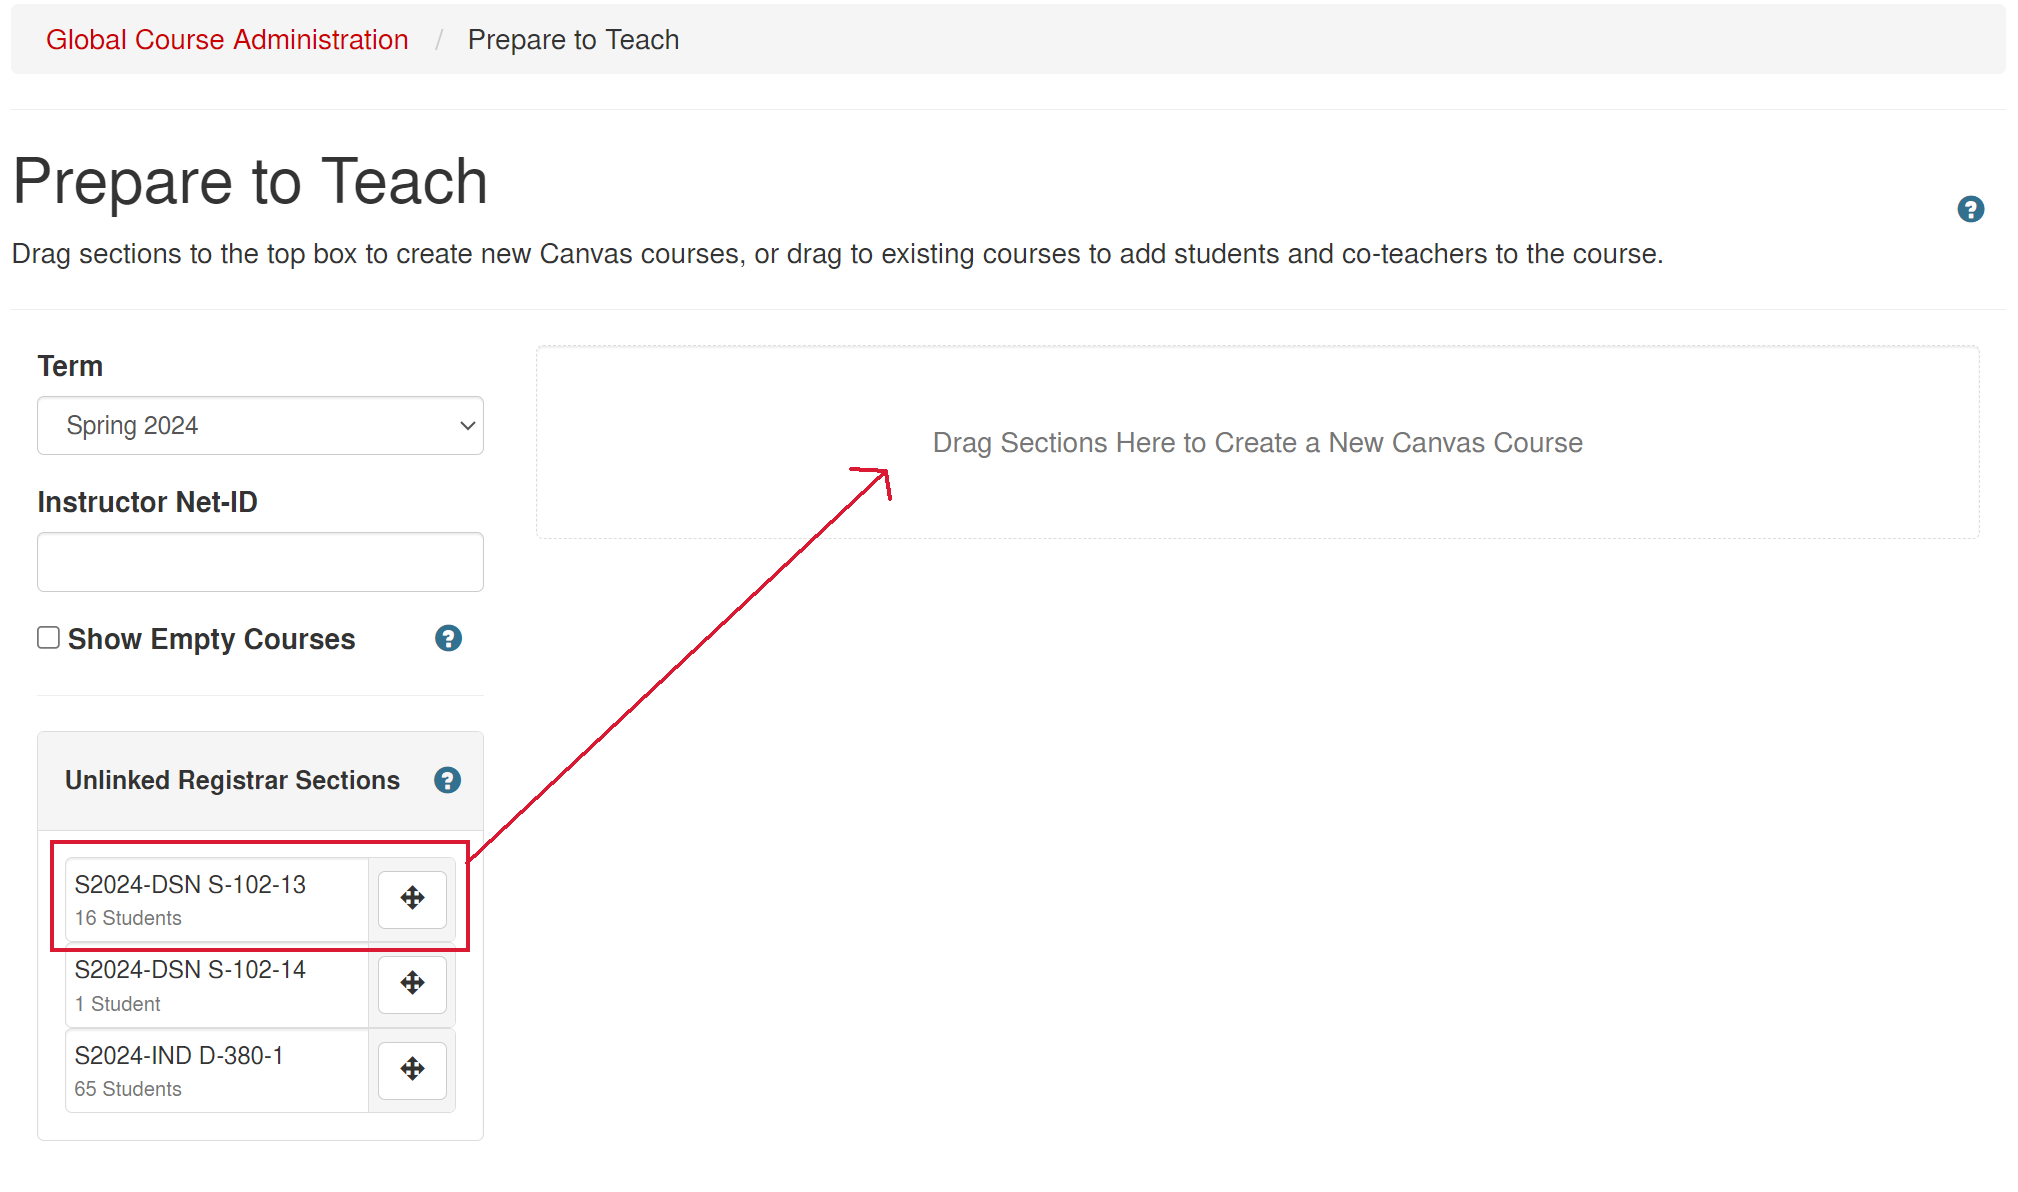
- Select Prepare to Teach.
- Select the appropriate term from the drop-down menu in the upper left-hand corner of the Prepare to Teach page. If the target term is not available yet, you will need to Request a New Course Shell.
- If you are the Instructor of Record, your course sections are listed under Unlinked Registrar Sections. If an expected section is not listed, check with your department’s Registrar contact.
- Click and hold to drag and drop an unlinked Registrar section on top of the box labeled Drag Sections Here to Create a New Canvas Course.
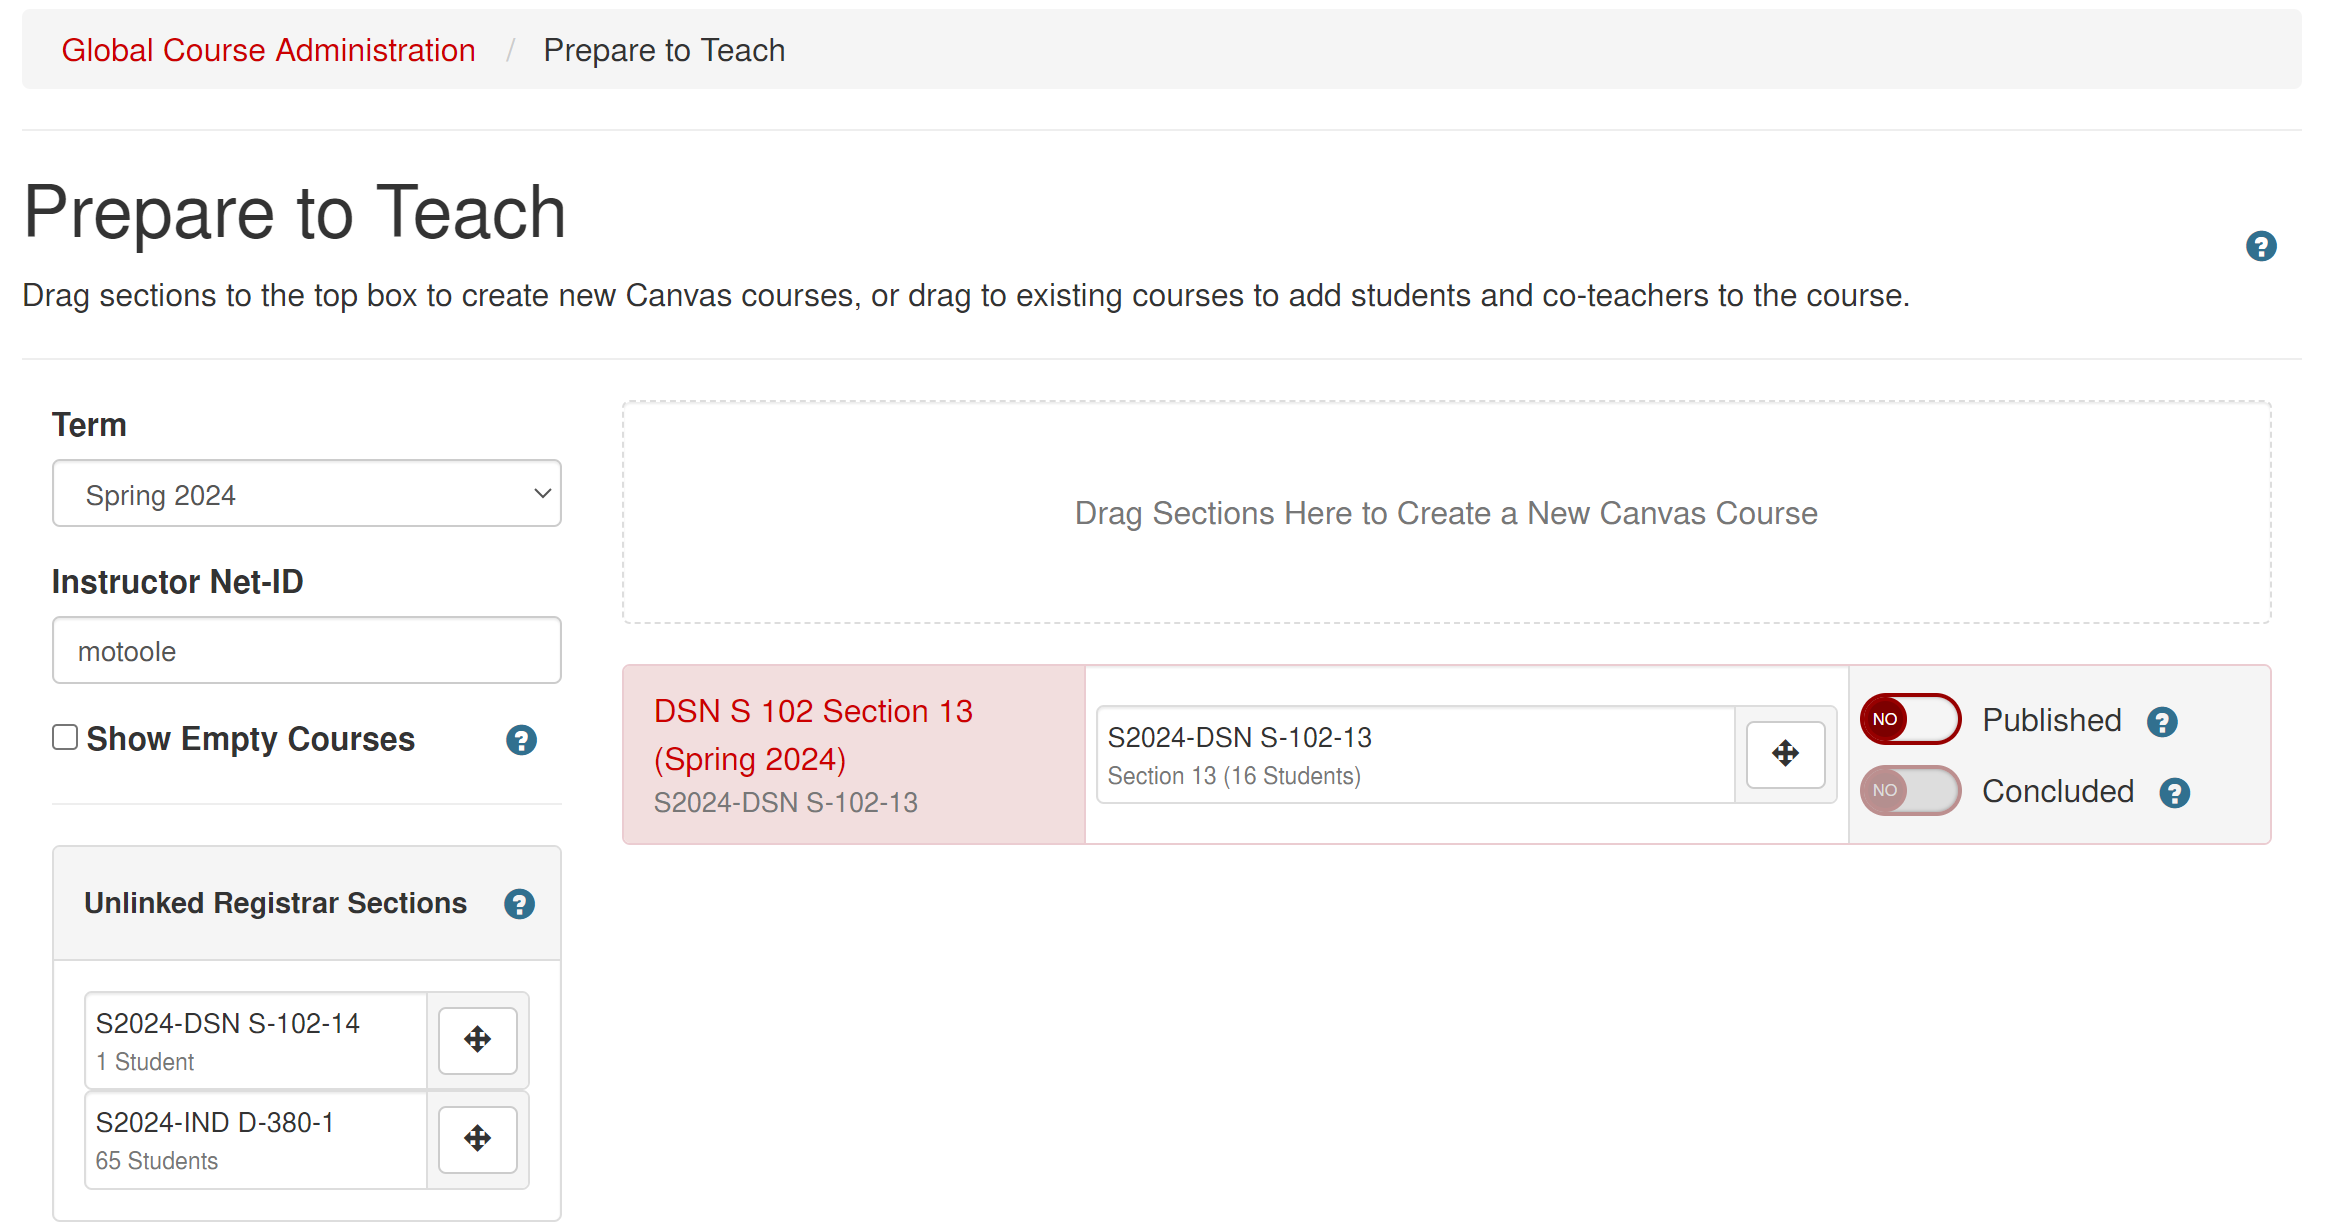
- To enroll multiple sections into a single Canvas course, drag and drop the additional unlinked Registrar section(s) on top of the course card created in the previous step.
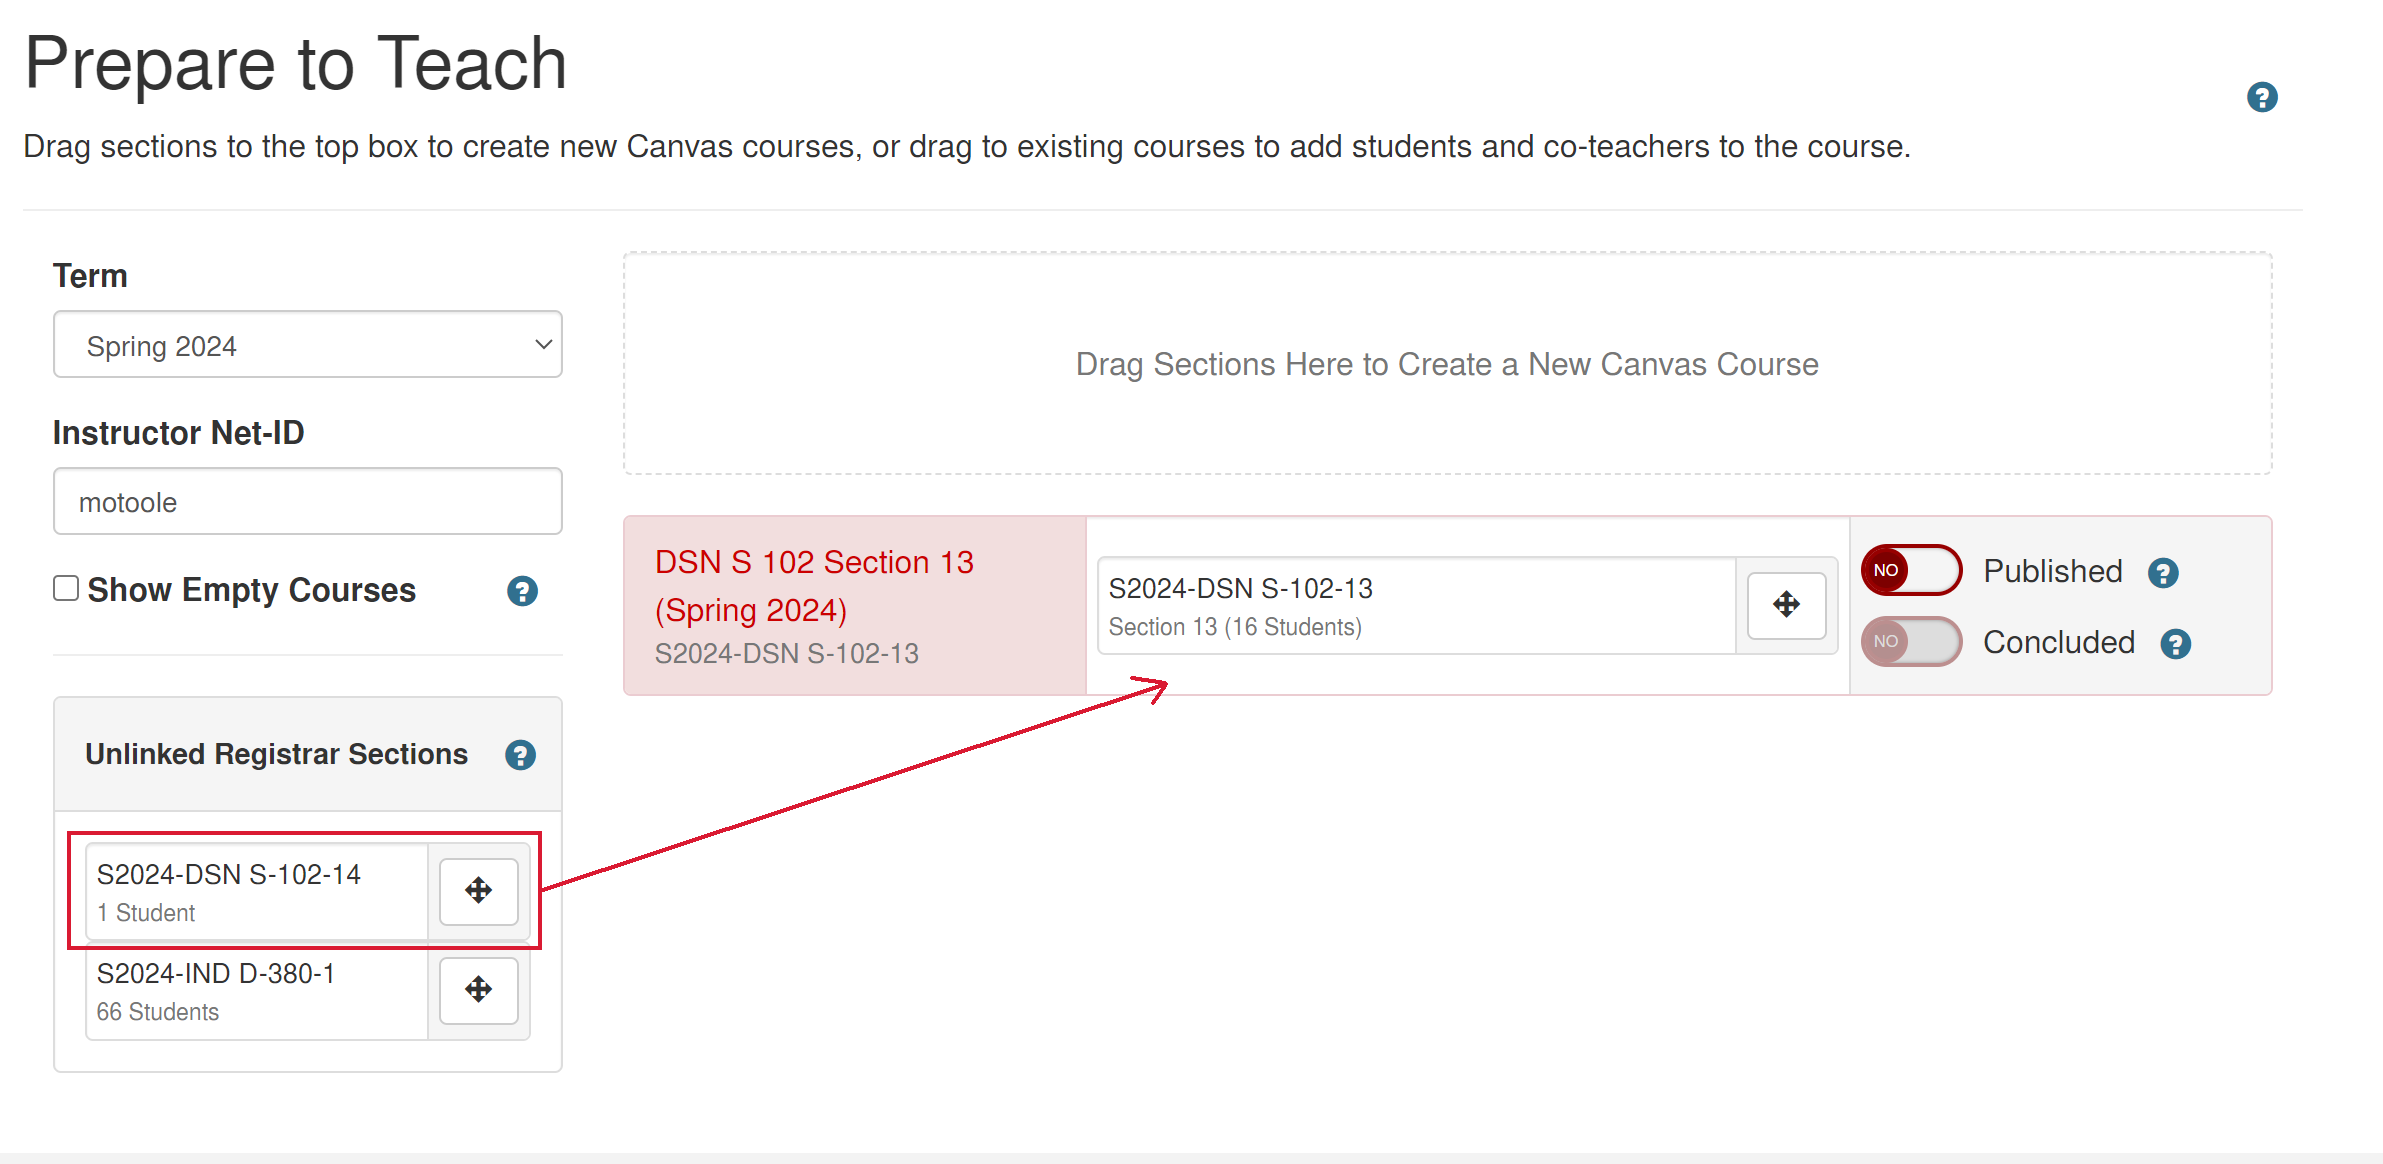
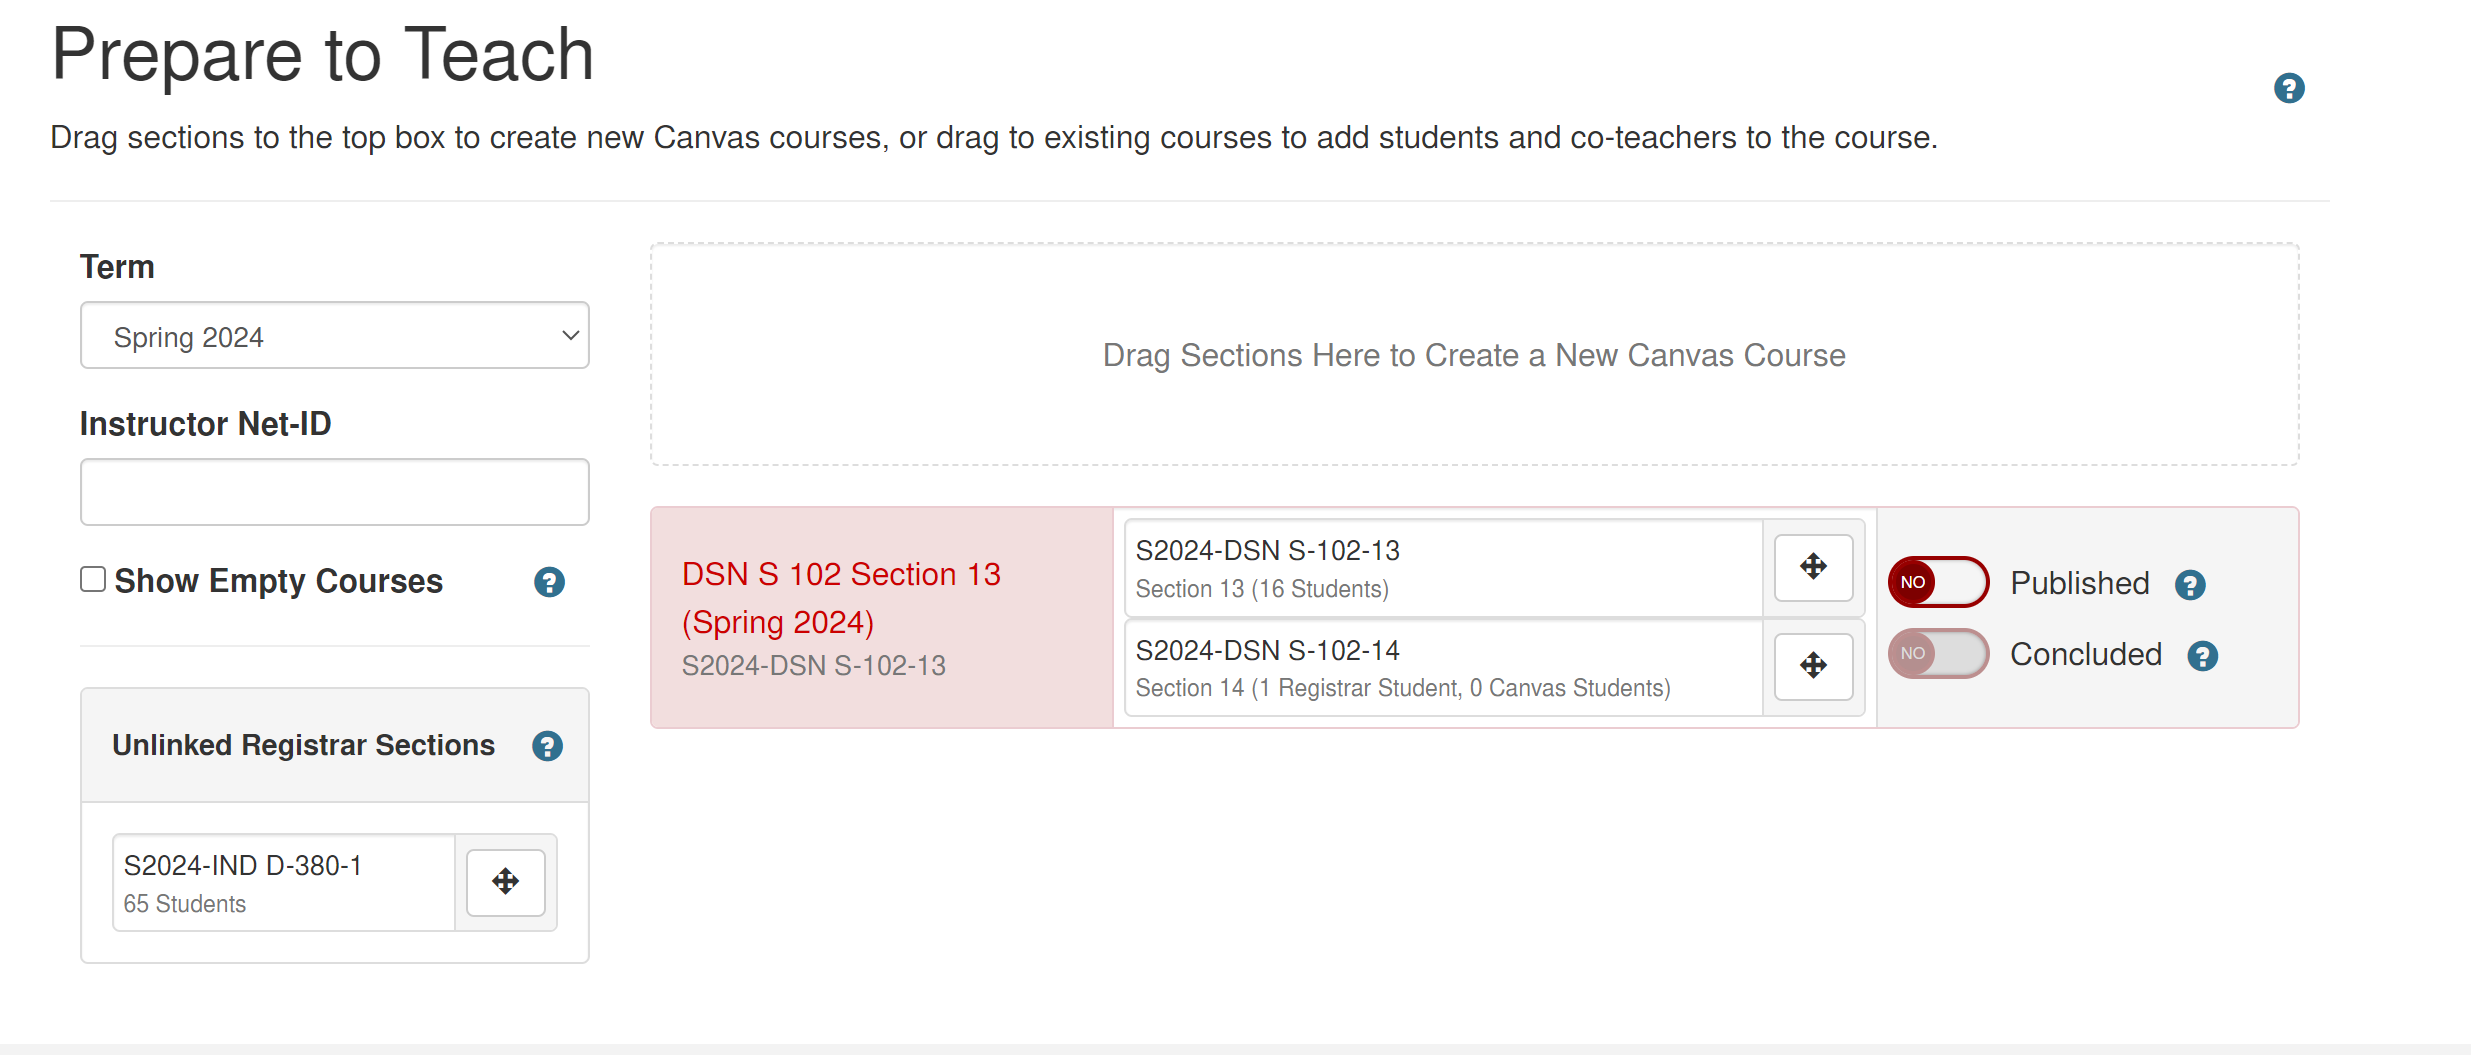
- To create another Canvas course, drag and drop an unlinked Registrar section over the box labeled Drag Sections Here to Create a New Canvas Course.
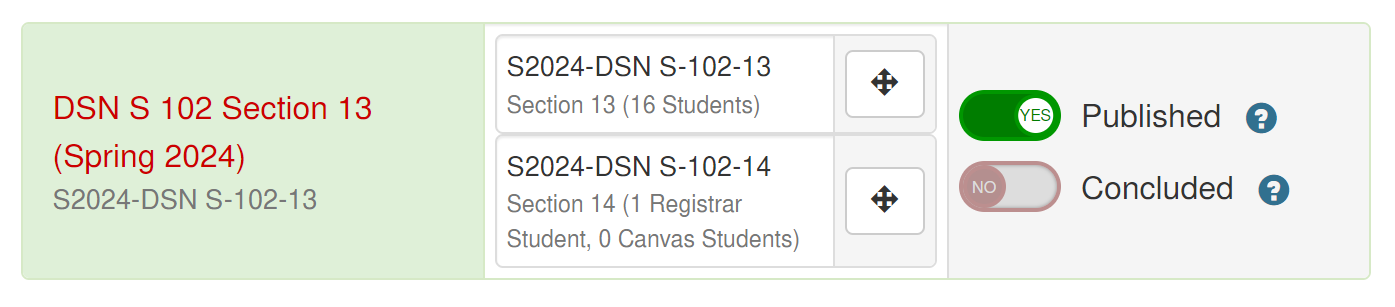
- Your Registrar enrollments are now linked to your Canvas courses. Student enrollments are sent to Canvas about three weeks before the start of the semester. Once enrollments are available, students will appear in your gradebook and under People in your Canvas course.
3. Add Content to Your Canvas Course
- Navigate to your Canvas course.
- Choose your course’s homepage.
- If you opt to use the ISU Course Template, the homepage is set up to follow Quality Matters guidance.
- Copy content from your past Canvas course using Course Import.
- If you have not yet taught with Canvas, add course content organized into modules.
- Add TA’s and CoTeachers to your course.
- Use Canvas Studio to create video content.
- If you plan to teach in CELT Media Classrooms, complete the Media Classroom Request Form to receive assistance with adding video content to Canvas.
4. Customize Course Settings and Clean Up Your Navigation
- Click Settings on our Canvas course navigation.
- On the Course Details tab.

- Add or replace the course image to display on the course card in the Canvas dashboard.
- Rename your course to add/remove section identifiers in the course’s Registrar-assigned name (see the change name/course code guide).
- Adjust course availability dates.
-
- Beside Participation, select Course from the dropdown
- Enter alternative Start and end dates to provide students with access earlier than one week before the semester begins or longer than two weeks after classes end.
- Use the “Restrict students from viewing course before course start date” and “Restrict students from viewing course after course end date” checkboxes to further limit student access.
-
- Scroll to the bottom of the page to Update Course Details.
- Next, select the Navigation tab.

- Disable course navigation links that you do not plan to use in your Canvas course.
- Connect publisher materials to your Canvas course via ISU’s Immediate Access program or Parks Library Course Reserves service.
- It is strongly recommended that you enable ISU Syllabus Statements. Enable the statements from the course’s Settings in the Navigation tab.
- Scroll to the bottom of the page to Save.
5. Enable Grading Scheme
- Navigate to Course Details in Settings as in Step #4.
- Enable your grading schema and ensure it matches the grading schema defined in your course syllabus.

- Check out the key concepts for grading in Canvas.
6. Ensure Your Canvas Course is Ready for Students
- Navigate to your Home page and enable Student View in the upper right-hand corner.
- Confirm the course navigation, and that all content appears and is available to students as intended.
7. Publish Your Course for Student Access
- Navigate to Global Course Administration via ?Help as described in Step
- In Prepare To Teach, toggle Published to Yes the course. The course card will turn green when the course is published.